PADI Digital Underwater Photography and Underwater Photographer Courses
Digital Underwater photography is one of the most popular diving specialties, and the rise of digital underwater photography has made it easier and more fun than ever. If your thinking on starting out and would like to make a career out of Underwater photography, contact us below.
Anyone – divers or snorkellers – can enrol in PADI’s newest eLearning course: Digital Underwater Photo Course online (aka DUP online).

The PADI Certification has two levels:
Level One certification is followed by a single training session in a pool, confined water or open water. It covers the basics of digital underwater photography, as well as gear assembly and care.
Level Two certification requires the level one training described above plus a second training session in open water. Additional material covered in level two includes: composing a photo, file formats, how to achieve good colour in your images, and other topics.
Click To See Our Online Digital Underwater Photo Course
What kind of training do you need to be an under water photographer?
This is why there are actually two PADI underwater photography courses. The PADI Digital Underwater Photographer course gets you going quickly with today modern digital equipment, whether you use a point-and-shoot snap camera or a sophisticated D-SLR like the pros.
The PADI Underwater Photographer course is a more traditional photography course designed for conventional film equipment.
The Fun Part: The fun part about this course is learning to capture images to share with your friends and family. It’s a great way to relive the adventures you’ve had.
Digital has taken the underwater photography world by storm. Get in on the action with the PADI Digital
 Underwater Photographer Specialty course. You can quickly and easily capture the underwater world with your camera and on your computer.
During the PADI Digital Underwater Photographer Specialty course, you learn to use the
PADI SEA (Shoot, Examine and Adjust) method, which takes full advantage of digital technology. The result is good underwater photos faster than you may imagine.
You not only learn how to take good photos, but how to share them with your friends via email or printing, optimizing your work with your computer, storage and more.
Must be a PADI Open Water Diver or Junior Open Water (or have a qualifying certification from another training organization)
Become a Underwater Photographer Instructor
However, you can take the course as a snorkeler and receive a non-diving certification.
- Choosing and using modern digital cameras and underwater housings
- Using the PADI’s SEA method for getting great shots quickly
- Editing and share your pictures
- The three main primary principles for getting good underwater photos.
- The PADI Digital Underwater Photographer certifications credits toward the Master Scuba Diver rating.
- All materials and Digital Camera is included. This is your ticket to a lifetime of intense adventure with Easy Divers Cyprus, the 5 star PADI dive company that sets the standards in the local and global diving community.
- PLUS you take all your photos away with you on a FREE PHOTO CD
The PADI Digital Underwater Photography specialty course has a two-level design:
Level 1:
Point-and-shoot cameras and their practicability
White balancing
Colour filters
Taking photographs without external flash
Level 2
Using histograms
File formats
Image resolution
Picture composition
Organization and archiving
*This is one of PADI’s most adaptable speciality courses, and can even be started during the last dive of your PADI Open Water Diver course*
Topics covered include :

- Basic photography tips
- Strobe diagrams for a variety of effects
- Tips for eliminating backscatter
- An explanation of the various digital file formats
- How to bring back the colour in your images
The crewpak includes the PADI Digital Underwater Photographer Manual and submersible white balance slate. The course materials preview skills you’ll practice with your instructor. Once the course is over, use your manual as a reference guide as you explore new environments and to evolve your skills.
This is included in the course
An Introduction to Digital Compact Underwater Photography
The last few years have witnessed nothing short of a revolution in entry level underwater photography. The arrival of low cost digital cameras and housings has made quality underwater imaging available to almost all divers. For the first time budget underwater camera systems are available that are versatile enough to tackle subjects that used to be the exclusive domain of professional SLR camera owners.
As with any aspect of photographic equipment, a certain amount of care is needed to ensure that you get the equipment you really need. This section of our web site is designed to guide you through getting started on your research into choosing your first underwater digital camera. It is really not meant to be anything more than an introduction. Once you’ve had a look through this information we would invite you to call us or email us with your questions or, better yet, drop by our showroom in Protaras Cyprus and talk through your needs with one of the underwater photographers on the Easy Divers Team.
Key benefits of digital cameras are…
Real Image Viewing – The LCD monitor on the camera back lets you see your subject exactly as it will be framed on your photograph. This does away with one of the biggest disadvantages associated with entry level film cameras: the separate viewfinder. Separate viewfinders see, as the term suggests, a separate image to the lens. Overcoming this to get accurately framed images requires practice. Often heads or tails are cut off, or part of the picture is excluded or stuff you didn’t want in the shot strays in. The LCD monitor avoids these problems altogether.
Instant Playback – The LCD monitor also lets you see the picture you have just taken seconds after you took it. This instant feedback lets you confirm that you got the picture first time or spurs you on to try again. The instant playback also puts you on a fast track learning curve. You will quickly discover what works and what doesn’t. You can see the effect instantly in the water.
Versatile Lenses – Digital cameras usually have zoom lenses built in. The zoom affords you the flexibility to frame shots the way you want and to zoom in on shy subjects. Keeping your distance from easily spooked critters makes it much easier to capture them on card. The close up or macro facility that is also built into most digital cameras allows you to shoot very small subjects like cup corals or clown fish easily.
Autofocus is as reliable underwater as it is in air. It usually allows you to shoot subjects at any distance from a few centimetres away to infinity. If a subject moves away or towards you the autofocus can normally track it.
Advanced Technology – Taking advantage of the volume marketplace has enabled digital camera manufacturers to increase specifications while actually reducing prices to the consumer. So many digital cameras offer a choice of exposure modes, such as program for getting started, alongside shutter or aperture priority or full manual for those who wish to take more control. We recommend only those digital compact cameras that let you choose the aperture yourself. This is vital for working with strobes. This is one reason that we actually argue against buying the vast majority of the camera and housing combinations usually on offer. You’ll often get exposure compensation for overcoming tricky lighting conditions and a choice of flash modes including slow sync for introducing movement to your images.
Colour Balance Control – You can usually alter white balance to help avoid colour loss underwater and some cameras have built in electronic filters for underwater use that can also help you get more pleasing tones without using a flash gun.
Control of the Final Image – Shooting prints has normally placed the photographer at the mercy of the developing and printing lab. Some are very good indeed. Others are not. The colour cast in underwater shots often seems to confuse automatic printers and the final results can be lacklustre. Digital photographers can control the look of their images by using software such as Photoshop. Using simple programs you can alter the brightness and contrast of your images, enhance or change colours, remove or add subject matter and crop to your personal taste. They can also print their own pictures inexpensively.
Low Shooting Costs – Digital is a very low cost way to shoot underwater pictures. Storage media, unlike film, can be used over and over again. It costs only electricity to view your results on your computer. You also have almost unlimited shots per dive. You can literally take hundreds of pictures on a single card. With film you are typically limited to 36 frames. If you want more pictures you need to take additional cameras down with you. With so few shots available, film photographers had to think very carefully about taking creative risks. The digital photographer has no such concerns. You can try for a shot that might not work out and simply delete it if it fails. But equally you might end up with a truly excellent image.
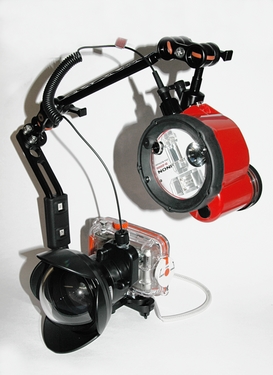
Fuji F30 with Inon Wide. Building a System for Effective Underwater Digital Photography Digital users can choose from a rapidly expanding range of accessories. These include flash units, strobe arms, filters, macro, wide angle and even super wide fisheye lenses. Before plunging ahead and investing heavily in accessories it is important to think through whether they actually offer significant benefits for the kind of photography you want to do. At Mavericks Diving we take underwater pictures ourselves using equipment that we sell.
Our experience in the field means we are able to talk you through the strengths and limitations of different set ups. Especially if you are just getting started, you may be surprised at how often we advise our clients NOT to buy accessories! The reason for taking the minimalist approach is that entry level digital systems are extremely versatile as is. So they are much less dependent on add on equipment to get good pictures. That said, for certain types of photography and in some conditions, additional equipment can make your picture.
Over the next few sections we’ll provide a guide to some of the equipment available and its applications…..
Do You Need A Flashgun? – No, Yes and Maybe….. Strobes offer three main advantages for underwater photography. Strobes can illuminate dark places. They can restore “true” colours. They can be used to light creatively. For night dives, for instance, a strobe simply provides illumination as it would on land at night. Restoring true colours is a little different. Colour, even when illuminated by the sun, is lost very quickly as you descend through water. Even the most powerful underwater flashgun cannot begin to compare with the sunlight. So the distance that you’ll get good colours over is very short – about 1.5 metres at best. This also assumes you can use a wide aperture on your camera – one reason we don’t recommend program or auto cameras is you cannot control this all important setting. Flash guns are also used to “aim” light to create shadows and textures for a more pleasing image. You don’t automatically need to buy a separate flashgun or strobe. Built in guns work very well for close up pictures, even in poor visibility. In clear conditions you can shoot over longer distances without incurring the dreaded backscatter. Built in guns have their advantages. The light is always aimed at your subject, exposure is automatic and there is no additional bulk and drag. Separate flashguns are needed in low visibility conditions. To avoid backscatter (light reflecting off debris between the light source and the subject) you have to move the light source off the camera. Typically you’ll want to get the strobe 30 cm to 45 cm off the camera. “Bolt on” strobes provide a little additional power, but do nothing to help reduce backscatter. Separate flashguns may also be essential with some add on lenses that can obscure the built in strobe. For extreme close ups off camera flash may also be needed to light your subject evenly. Built in flashguns provide only one kind of light – full frontal. If you want to light your subject creatively to enhance textures or create a mood, then an off camera flash will let you do this.
Flash has been used to lift the images of the fish in the foreground. Strobe or Video Light? – We supply our commercial diving clients with digital inspection systems. Typically commercial divers have to work in very poor visibility. Also, it’s the nature of the commercial diving world that divers are often presented with equipment with which they are unfamiliar and told to “dive it”. It’s also likely that the equipment will be mistreated. We usually supply commercial operators with video lights. They need little maintenance, require the minimum of assembly, as they are cable free and, in the rugged environment of working diving, have fewer failure points than a strobe system. The downside is that a videolight that provides sufficient light for general photography (around 50 watts or so) for a reasonable length of time (say fifty minutes) will be heavy and bulky. This can make them a pain to travel with. Lights that are heavy in the water also require quality arms to properly support them – which are expensive. Video lights will also need to be recharged regularly, perhaps even between dives, and this will usually take a minimum of three hours. Many lights take much longer. If you make multiple dives this becomes a major consideration. On balance we believe that most underwater digital photographers are better served by using underwater flashunits, rather than videolights.
Choosing a flash unit – Digital stills cameras don’t automatically operate well with all flashunits. If you already own an underwater film camera then it is quite likely your existing strobe won’t work well (or at all) with a digital camera. Digital cameras present two problems for flashgun designers. Firstly, they don’t measure the light in the same way as film cameras. That has meant going back to the drawing board for underwater flashgun manufacturers.__Digital cameras put out a series of pre flashes to determine correct exposure. Many digital cameras and housings cannot easily be wired to an underwater strobe. So the strobes have to be fired by a slave. The light from the cameras own strobe triggers the underwater gun. With film cameras it is relatively simple to slave a strobe. The triggering strobe fires once and the slave fires with it. With pre flashes it is more complicated. The slave gun has to fire at the right time. So it has to fire in sync with the final flash from the built in gun. Complicating things further, the number of preflashes isn’t standardised. To get over this, some guns are designed with high speed recycling – they simply fire with all the preflashes and the main flash. Others offer a programmable feature that can be set to ignore pre-flashes. Another issue is putting the right amount of light on to your subject. This is less of an issue with film cameras because print film is easily manipulated and corrected at the processing stage. So for entry level film cameras a simple flash unit with just one power setting is usually adequate. Digital cameras require much more accurately controlled lighting. There are four principle methods of getting the right exposure with off camera strobes. It is important to understand the differences and to thoroughly check the small print to confirm the strobe you are considering really does operate the way you think it does. At the moment we feel that some manufacturers and suppliers are creating confusion by claiming greater degrees of automation than their guns strictly provide. It also does not help that the industry has not standardised terms to describe how strobes work and what they can and cannot do.
Mavericks Quick Guide To How Digital Strobes Work Manual Strobes – Manual flash units do not provide automatic exposure. If you use a gun designed for a film camera, and can get it to sync with your camera, you may be able to get good exposures. However it takes experience and skill. Usually a strobe designed for a film camera has only got one to three power settings. This does not give you a lot of discretion for shooting at different distances or for adjusting for different shades and reflectivity. A manual strobe for digital cameras will usually have six or more power settings. Like the dimmer on a light switch, having so many choices gives you lots of scope for lighting all sorts of subjects over a range of distances, from super-macro to distance shots. To shoot with a manual gun, you take a picture, review it and then adjust the power of the gun until you have the exposure you like best. With a little bit of practice it becomes much less hit or miss than it sounds! You’ll probably get the exposure right first time more often than not. However it is a problem with moving subjects that keep varying their distance, because you have to change the power settings in time to their actions.
Colours are quickly lost underwater. Both depth and distance to your subject diminish colours. Auto Strobes – Auto guns use a sensor built into the strobe or attached via a cable that measure the amount of light that the strobe puts out and quenches it when the subject has received enough light. Auto strobes were used on film cameras until the early eighties, but were not overly popular. They have only been recently reintroduced for digital users. Auto sensors have some limitations. You have to work with your camera set to a specific aperture. Most digital compacts that can be housed do not have this option, making them unsuitable for use with auto guns. If you change the aperture setting you must remember to change the aperture setting on the gun as well so both match. There may be limitations on the apertures you can use and on the film speeds you can select. These may not be the best settings for your water conditions and subjects. The sensor can also be fooled by being poorly placed. For example turning the gun inwards to light a diver’s face who is slightly off to one side, while the sensors is pointing directly out into mid water. In this case it may not “see” the main subject and deliver a poor exposure. Backscatter can also fool sensors and create inaccurately exposed pictures.
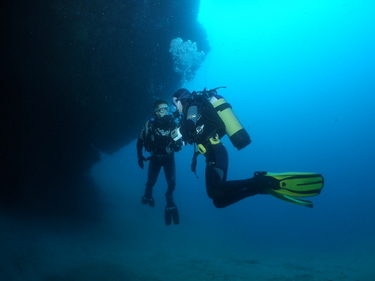
30 metres down, light from an Inon D-2000 strobe lights both divers—but only because a wide angle lens allowed the photographer to be only 1.5 metres from his subjects. TTL (Through The Lens) – Our definition of a TTL or camera controlled flash is a system where the camera’s own internal flash is used to control the exposure of the slaved gun. To do this a fibre optic cable is usually placed in front of the camera’s own flash unit. When you take a picture the internal gun fires and triggers the external gun like an ordinary slave. The camera sees a burst of light and assumes it came from it is own gun. When the camera determines that the subject has been properly lit, it turns off the built in gun. This in turn shuts off the external gun, ensuring a properly exposed flash picture that is fuss free and consistent. Because the sensor that controls the flashgun is built into the camera you cannot miss aim it. It is also less prone to being affected by backscatter as it is not normally in line with the strobe. A further benefit is that if your camera has a flash compensation feature, this will also control the external strobe as well. This can be useful as it allows you to customise the exposure to your taste. For example if you photograph divers it is quite common for the auto exposure to be fooled by dark equipment on their bodies. This causes the automatic exposure to boost the flash power to compensate. The result is that the diver’s face is often greatly overexposed. By setting the flash compensation exposure to underexpose a little, this problem is solved. If your camera does not have this feature you’ll find it provided on some underwater guns. These are normally just selected on a dial and can be faster to use than a menu based selector.
Since the external gun is controlled directly by the camera’s own built in gun, adjustments made to the camera are automatically relayed to the strobe. If you alter the aperture or film speed there is no need to make any additional adjustments to the strobe. So there is almost no scope for making an error by being forgetful or narced. Camera controlled flash is our recommended solution for working with currently available consumer camera and housing combinations represented by Fuji, Olympus, Sony, Canon and similar own label suppliers.
For scenics, a wide angle lens is essential. D-TTL – D-TTL are the most sophisticated flash control systems available to digital underwater photographers. They are most commonly used with digital SLR cameras. These camera and housing combinations let you hardwire your flashgun straight into the camera’s own hot shoe. The camera’s through the lens (TTL) meter controls the exposure from the strobe. This is a highly dependable and accurate method of both firing your strobe and getting perfect flash exposures. Because metering is through a sensor mounted behind the camera lens it is unaffected by the field of view of the taking lens and it always sees the main subject. Because the flashgun is wired directly into the camera, rather than working as a slave, camera manufacturers expressly warn against using strobes supplied by other makers. Doing so will almost certainly void your warranties. Similar reservations were expressed when independently manufactured strobes were made available for the Nikonos range and when 35 mm SLR owners used unofficial strobes with their housings. Time will tell if these concerns are justified.
Masters and Slaves – Slave is a term you’ll commonly hear bandied about by underwater photographers. It refers to any additional flashgun that is triggered by the burst of light from another gun (the master, which is connected to the camera). Slaves are often used to light creatively. For example you can hide a gun behind your subject for rim lighting, or you can give a slave to a diver who is modeling for you to make it look like they are holding a powerful torch. Cave photographers often attach rear facing slaves to other divers in order to light cave passages behind them and add depth to their images.
One Strobe Or Two? – If you are just getting into off-camera strobe photography, we always recommend that you work with just one gun. Two guns add bulk and cost and usually require more skill to shoot successfully. Basically, if you are new to underwater photography, two strobes are probably more trouble than they are worth. Two guns are useful when working with extreme wide angle lenses in dark conditions, such as inside a cave. This is because a single strobe usually does not have enough spread to cover lenses wider than a hundred degrees. In this case the second strobe is used to simply provide additional spread to avoid hot spotting and dark corners. In bright open conditions it is often perfectly viable to light even a superwide lens with a single gun. Any fall off at the edges tends to blend with the sunlight and looks quite natural. For creative lighting using a pair of guns can let you light from two angles to create or reduce shadows or to use back or rim lighting. Getting creative with your lighting angles can lift a picture by providing much greater impact. Finally, many top underwater photographers swear by one or two strobes and won’t be swayed in their opinions. So there is no cut and dried answer as to how many you should use.
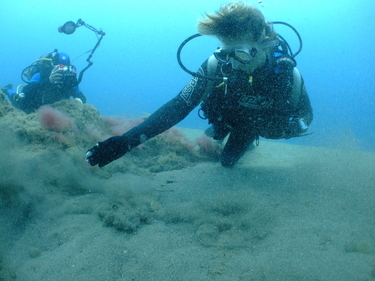
Sand and other particles create backscatter—the dots you see in underwater images. Keeping the strobe high above the camera helps eliminate or minimise the effect. Strobe Arms – Often overlooked and undervalued, strobe arms deserve some careful consideration. Basic strobe arms are often supplied with strobe packages to keep the purchase price low. Typically they place the gun to one side of the camera lens and slightly above it. This works fairly well in clear water, but will create backscatter in turbid conditions. This fixed position provides little benefit over using the built in gun for shooting with the standard lens or close up accessories. If you use wide angle lenses in clear water it does work quite well in our experience. Built in guns do not usually work satisfactorily with wide angle lenses as the coverage is not matched and often the lens obscures part of the flash. Both scenarios lead to dark patches in the final picture. If you want more flexibility to light your subjects you can either hand-hold your strobe or use a more versatile flashgun arm. Some basic arms cannot be updated and you’ll need to buy a new arm altogether. Others are designed to accept extension sections and clamps, allowing you to build on your system at relatively low cost as and when you feel your photography requires it.
Wide Boys – Wide angle lenses serve three main purposes. They let you shoot large subjects, operate in low visibility and manipulate perspective. Water has two main effects on underwater photography. It isn’t really clear. Even crystal clear water only equates to a foggy day topside. The debris in the water column physically obscures your subject, making it look soft or out of focus. The more water you have between your camera and the subject, the worse the picture looks. To keep the picture sharp, you need to get as close as possible to your subject. By reducing the water column between your camera and your subject, you also reduce the amount of detritus you have to shoot through. With large subjects like whale sharks and wrecks, a wide angle lens is essential for good photography.
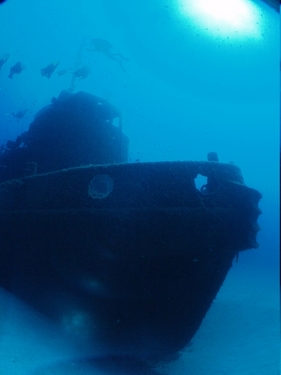
This wreck had to be photographed using an add-on fisheye lens—an extreme wide angle. The Rozie, off Comino, is simply to big to shoot with the camera’s built in lens. The second effect of shooting through water is that it quickly absorbs colour. You’ll only get bright reds, for example, in shallow water over short camera to subject distances. To counter this flashguns are often used. However flash has a limited range through water. So getting close, even with flash or video lights is also vital to capturing vibrant images. Wide angle lenses let you get close enough to large subjects, like other divers, to get good colours. In low visibility, wide angles become vital for anything other than macro and close up photography. In the typical conditions found in the UK, you might have to photograph large subjects like your buddy from under a metre away. Wide angles let you do this.
Wide angle lenses also let you play with perspective. Close focus, wide angle, is an example of this. By placing a smallish subject in the foreground a few inches in front of the lens you can make it tower over a diver just a little further away. Half and half shots or split levels are also possible with some set ups.
This shot was taken using a Fuji F30 equipped with both an Inon fisheye lens and an D-2000 strobe. The rich colours are made possible by staying within 1.5 metres of the model and using a wide aperture. For consumer cameras, wet lenses are readily available. These either screw directly into the housing or mount via an adapter. They can be fitted and removed underwater in a matter of seconds, providing great flexibility. Holders let you store your lenses safely, usually on your strobe arm. Wet lenses can sometimes be used in air. Typically they cover 85 to 100 degrees – roughly equivalent to a Nikonos 20 mm or 15 mm lens. The exact coverage will depend upon your camera’s own lens. Prosumer SLR cameras use normal land lenses placed behind special ports attached to the housing. You need to choose your lens before the dive.
Macro Lenses – Most consumer digital cameras have a macro or extreme close up facility built in. This lets you photograph tiny subjects such as nudibranchs and porcelain crabs. However there may be limits on how close you can really shoot underwater because of flashgun limitations. Some cameras don’t permit the use of flash at very near distances because the flash cannot light the whole frame evenly. In this case an off-camera flash will not work because there is no flash from the camera to trigger it. Macro lenses usually attach to your housing via a screw thread or an adapter. They allow you to shoot from further back while still filling the frame. This lets you use your built in flash or an off-camera strobe as you prefer. You can also use much of your zoom range for more control over the final composition. Keeping your distance also helps to avoid damaging coral and can make shy creatures easier to photograph. Prosumer cameras use macro lenses that are designed to provide a continous focusing range from a few centimeters away to infinity. For even higher magnification prosumer camera owners may add teleconverters or close up lenses.
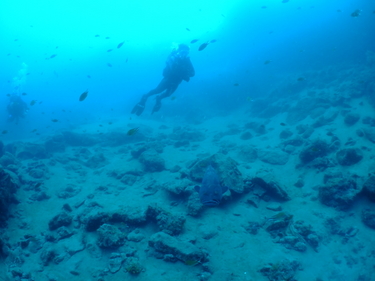
This shot, taken with flash, reveals more of the diver. But colours are drab because of the distance to the diver. Buying from Mavericks Diving What to Expect When you buy from Ocean Optics-Mavericks Diving and can call in, we will want to spend time going through your housing set up with you. During your visit we will check that all the controls on your camera and your housing have linked up properly and are operating correctly. We have decades of experience of working with housings, both as retailers and as manufacturers. Based on our knowledge of housed cameras we don’t assume everything will match up perfectly first time. Especially if this is your first underwater camera, we will also want to spend time demonstrating the steps you will need to follow to ensure the ocean stays out of your housing and off your camera. We’ll also explain the rationale behind the precautions that we recommend. O-ring handling and pre-dive testing are just two of the subjects we will cover with you. This is also a good opportunity to ask us any questions that you have about shooting techniques. Typically going through all of this will take around 20 minutes. We like to consider ourselves to be very attentive to the needs of our clients long after they have bought their equipment from us.
With the diver much closer, colours are brighter and flesh tones are accurate. About Own Label Housings It is very rare for a camera manufacturer to design and build their own underwater housings and accessories. For D-SLR cameras it’s usual to have to look for an independent housing maker. The camera manufacturer does not normally have any ties to the housing company and usually does not offer any cooperation. With digital it is very different. An increasing number of camera manufacturers are providing housings under their own label. Usually the design and manufacture of these cases is subcontracted to a small specialist designer. The digital revolution has been very good for consumers. Divers have especially benefited. The housings on offer by camera companies are not specifically targeted at underwater photographers. They are chiefly aimed at outdoors photographers such as snow skiers, kayakers, boaters and people working in humid environments like jungles. These markets are much larger than the diving market and, for the first time, have allowed us to gain from mass prodution techniques. To put this into perspective consumer digital housings are built in the low thousands while housings for D-SLR cameras may have production runs measured in tens of units. The cost savings are enormous and has made quality underwater housings available to divers very inexpensively. Because underwater photographers are not the main market for own label housings, there is little development of accessories for divers being initiated by the main camera players. For these you will normally have to look to independent manufacturers. Again, this is a common situation for underwater photographers. The classic Nikonos cameras (1964-2001) are a good example. Nikon only ever made a small number of accessories for this camera. It’s versatility was enhanced by the far greater range of products developed by small manufacturers, including us. However working with independent manufacturers can have its pitfalls.
Natural light shots can have impact and are easy to take. The huge range of camera and housing combinations can make it hard to properly test the compatibility of lenses in particular. Each time a new camera and housing are introduced, the system really needs to be tested with the existing lenses. The reality of small company production techniques means that lenses cannot perpetually be upgraded each time a new rig appears. With many housings, filter threads are not fitted. This oversight means that to attach filters or lenses you will need an adapter built by someone else. Using adapters has the potential to create problems with your optics, so it is important to talk with us before investing in additional lenses to confirm compatibility. Similar issues can occur with strobes as touched on earlier, it is vital to ensure that your flash unit and camera are properly matched to avoid problems with exposure and pre-flashes.
Not all independent accessory manufacturers abide to the stringent quality control standards imposed by companies like Fuji, Olympus, Canon and Sony on their own subcontractors. This can lead to disappointment in the performance or reliability of your new accessory. Our experience is that housings that carry the name of the camera manufacturer themselves are intrinsically reliable. However it’s a seemingly disposable world and none of the major manufacturers provide spare parts or much in the way of aftersdales for their housings. It’s annoying, but that said the costs of the equipment has become so low it is probably cheaper to write it off every few years than pay for servicing or insurance. On the plus side some very innovative equipment is being designed for use on own label housings. Fortunately, by simply changing an inexpensive adapter, your strobes and lenses can normally be switched from your old system to its successor. Check with us first, though! This is quickly taking consumer digital systems out of their original role as clear water snap shot cameras and placing them in a realm where they easily achieve images previously taken on film cameras costing thousands of pounds.

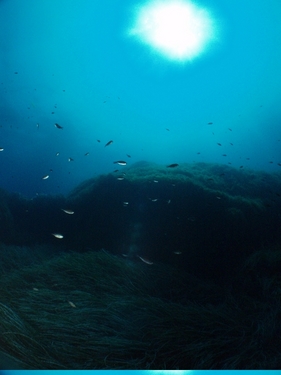
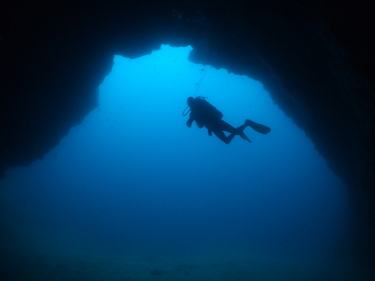
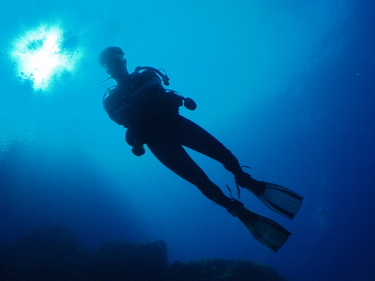
Natural light shots can have impact when shot as silhouettes. This required the camera settings to be altered to create underexposure.
Steve Warren underwater photography equipment specialists Ocean Optics. He is a published underwater photographer and writer.
MCS Underwater Photographer’s Code
Most underwater photographers are concerned to protect the environment in which they take their pictures and to avoid stressing marine creatures when they are taking their images. This is good for the marine environment and leads to better photographs. This Code sets out good practices for anyone who aspires to take pictures or video underwater. Many aspects are also applicable to the general sports diver.
No-one should attempt to take pictures underwater until they are a competent diver. Novices thrashing about with their hands and fins while conscious only of the image in their viewfinder can do untold damage. Every diver, including photographers, should ensure that gauges, octopus regulators, torches and other equipment are secured so they do not trail over reefs or cause other damage.
Underwater photographers should possess superior precision buoyancy control skills to avoid damaging the fragile marine environment and its creatures. Even experienced divers and those modelling for photographers should ensure that careless or excessively vigorous fin strokes and arm movements do not damage coral or smother it in clouds of sand. A finger placed carefully on a bare patch of rock can do much to replace other, more damaging movement.
Photographers should carefully explore the area in which they are diving and find subjects that are accessible without damage to them or other organisms.
Care should be taken to avoid stressing a subject. Some fish are clearly unhappy when a camera invades their “personal space” or when pictures are taken using flash or
lights. Others are unconcerned. They make the best subjects.
Divers and photographers should never kill marine life to attract other types to them or to create a photographic opportunity, such as feeding sea urchins to wrasse. Creatures should never be handled or irritated to create a reaction and sedentary ones should never be placed on an alien background, which may result in them being killed.
Queuing to photograph a rare subject, such as a seahorse, should be avoided because of the harm repeated bursts of bright light may do to their eyesight. For the same reason, the number of shots of an individual subject should be kept to the minimum.
Clown fish and other territorial animals are popular subjects but some become highly stressed when a photographer moves in to take a picture. If a subject exhibits abnormal behaviour move on to find another.
Night diving requires exceptional care because it is much more difficult to be aware of your surroundings. Strong torch beams or lights can dazzle fish and cause them to harm themselves by blundering into surrounding coral or rocks. Others are confused and disturbed if torch beams or lights are pointed directly at them. Be prepared to keep bright lights off subjects that exhibit stressed behaviour, using only the edge of the beam to minimise disturbance.
Care should be taken when photographing in caves, caverns or even inside wrecks because exhaust bubbles can become trapped under overhangs killing marine life. Even small pockets of trapped air which allow divers to talk to each other inside them can be lethal for marine life.
The image in the viewfinder can be very compelling. Photographers should remain conscious of their position and of the marine life around them at all times. In sensitive areas, they should avoid moving around on the bottom with their mask pressed up against the camera viewfinder.
Areas of extensive damage or pollution should be reported to the appropriate authorities. Today, when so many more divers are taking up underwater photography, both still and video, it is essential that the preservation of the fragile marine environment and its creatures is paramount and that this Code of Good Practice is carefully observed.
This Code of Conduct has been introduced by the Marine Conservation Society with funding from PADI’s Project AWARE project. It is endorsed by the British Society of Underwater Photographers, the Northern Underwater
Photographic Group and the Bristol Underwater Photography Group as well as being supported by the Sub-Aqua Association, the British Sub-Aqua Club and the Scottish Sub-Aqua Club.
For more information on becoming a PADI Digital Underwater Photographer, please contact us and fill out the form.